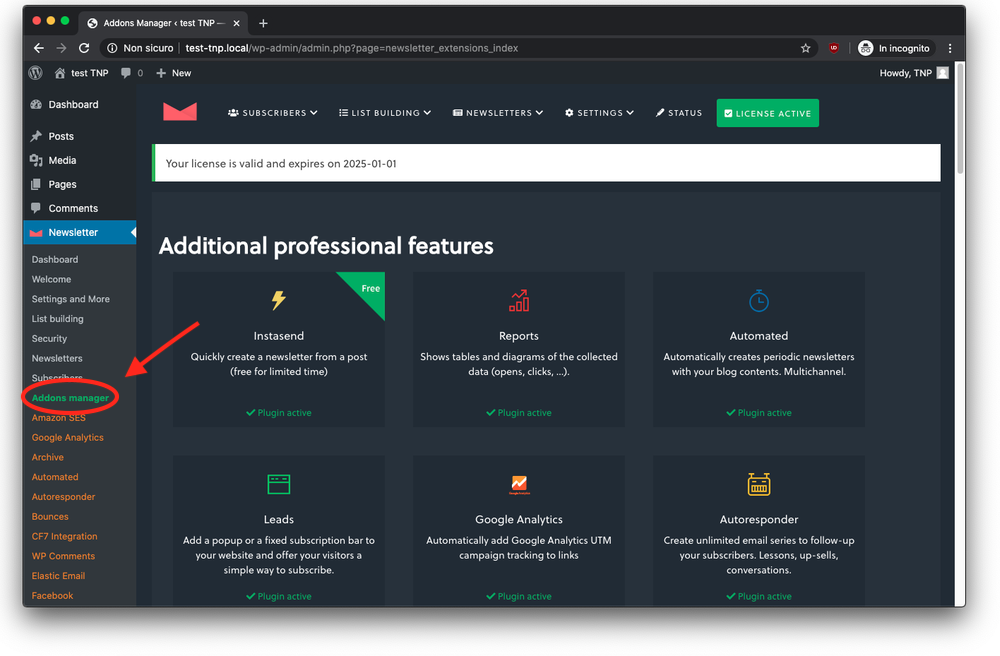
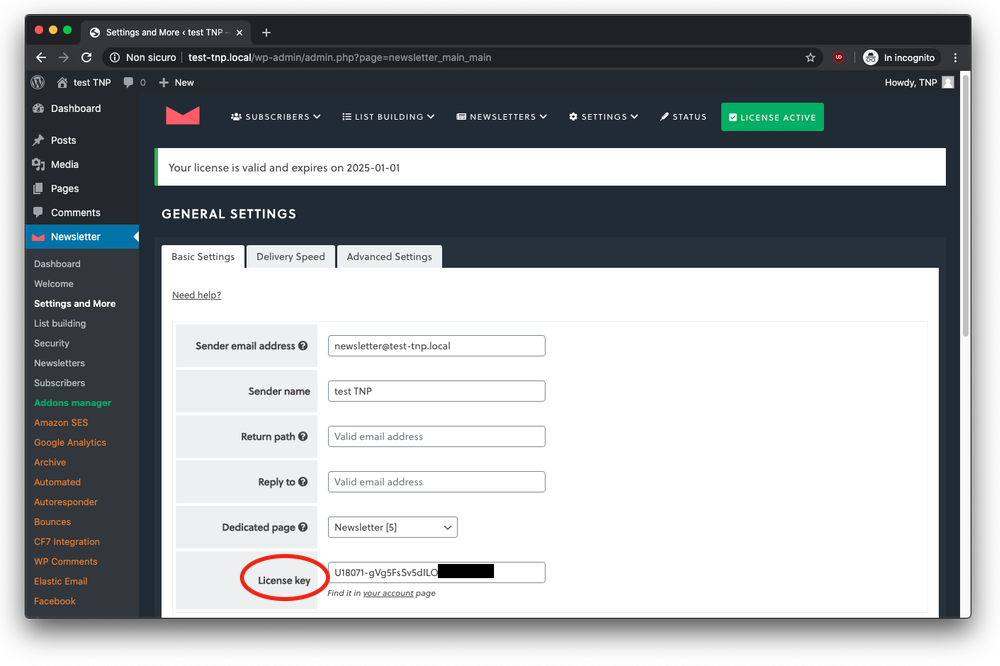
Newsletter has several addons that add many features to the plugin. The supported addons can be downloaded from the Addons panel inside your newsletter administration area. Our addons are regular plugins: some of them are free and some others are premium extensions. To install the latter you have to set the license code in the Newsletter main settings panel. You can find your license code in the account page.
There are two main ways to install addons. You can use our Addons Manager, which allows one-click installation of all the extensions, or you can install the addons manually.
1. The Addons Manager
The easiest way to handle the addons is to install the Addons Manager. Find more information about it on the dedicated page.
When the addons manager is active, you will find all the extensions on the left side panel under the Addons panel. Remember to set your license code on the main settings of Newsletter to enable the installation of all our premium addons.


2. Manual installation of the extensions
There are just 3 easy steps to install the addons:
- Open your Newsletter Account and download the required extension in zip format;
- Open your WordPress dashboard and go to the plugin panel. Then click on “Add New” and then on the bottom “Upload”, on the top of the page. Select the file you just downloaded (you don’t need to unzip it) and let WordPress install the plugin;
- Activate the plugin, which will be automatically recognized by Newsletter as an extension. You should now find a new voice under the Newsletter main menu.
Important notes: the extension files are usually added to the wp-content/plugins folder of your WordPress site, inside a folder named newsletter-[extension name].
3. How to update and uninstall extensions
As stated above, our extensions are regular plugins. Therefore, to update them, you just have to go to the plugin panel and use the same procedure you use for all the other plugins you have on your blog. If you have troubles with updates (see the next paragraph for more details about errors and solutions) you can proceed with a manual update. Just follow these steps:
- Deactivate the extension you want to update;
- Delete the extension (no data will be lost);
- Download the latest version fro your account page;
- Install the zip package from your plugins panel (see the paragraph above, “manual installation of the extensions”;
- Activate the extension.
Important notes: Remember to NOT customize the extension code, as the update will restore the original files!
Removing an extension
As we said, our extensions are normal WordPress plugins. Therefore, they can be deactivated and removed from the plugin panel, using the actions provided by WordPress.
Important notes: on removal we decided not to delete options/data collected by an extension, as the removal process can be used to restore a compromised blog or for other maintenance activities.
4. Possible errors
a. Blogs not allowed to connect to other sites
If your blog can not connect to other sites or is limited to selected external sites, you may have problems in validating the licenses and in downloading the extensions.
To check if this is the case, enter the Newsletter main settings, set your license key and save: the panel should report eventual errors.
Errors like “connection timeout” should be reported to your provider. You should ask to unlock the connection to https://www.thenewsletterplugin.com.
b. Errors in zip format
Our extensions are packaged in a standard .zip format. If you see errors regarding the .zip format, probably it means that your blog is not able to download the extension and unpack it.
Check if the license is valid and verified in the main settings of Newsletter. If the error persists, try to install the extensions manually.
c. Very old extensions
Newsletter extensions, since version 2.x are regular WordPress plugins and they can be installed directly from your blog plugin panel. If you have old extensions installed in the wp-content/extensions/newsletter folder, you must remove them!
