WooCommerce is the leading E-commerce plugin for WordPress and one of the most used plugins in general.
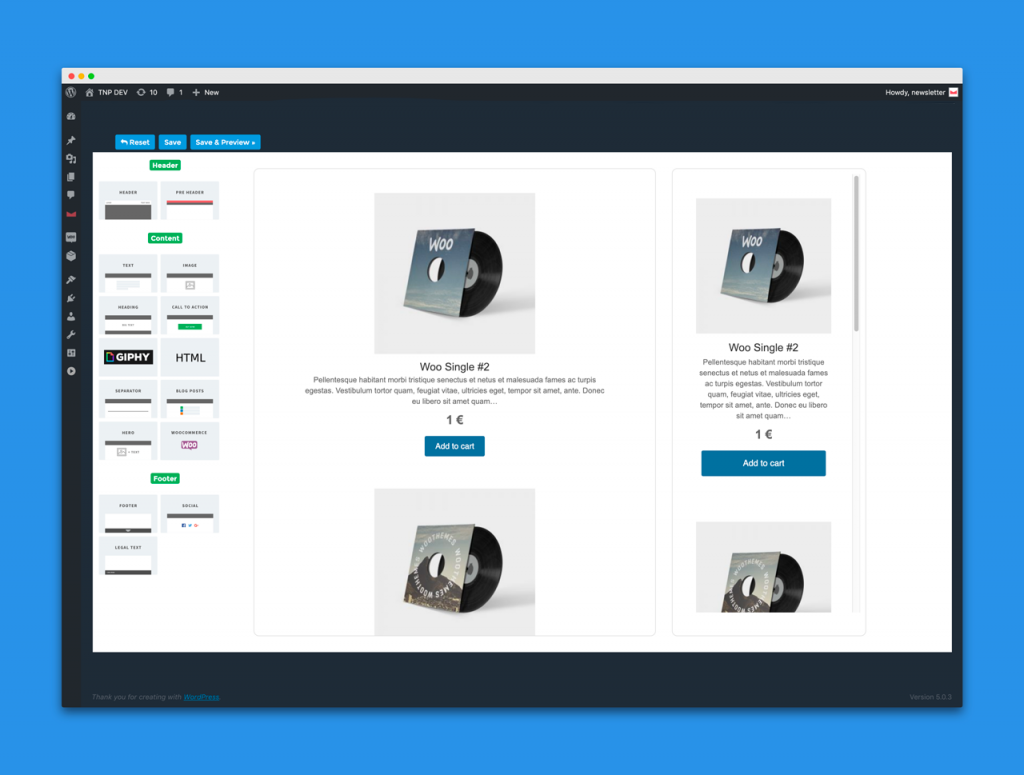
Newsletter’s Woocommerce integration allows you to automatically subscribe customers to specific mailing lists and to optionally embed a radio button on every WooCommerce-generated checkout page. Moreover, you can create a newsletter with the last available products by using the Woocommerce block on our Drag&Drop Composer.
Real-time subscriber segmentation is available. Customers can be added to specific subscriber lists based on the products or product categories of their orders. For example, if a customer buys a sports-related product or a product that is part of a sports category on Woocommerce you can add him/her automatically to a Sports news list, by setting an attribution rule.
Activating WooCommerce Addon
First of all, be sure to have installed and activated the WooCommerce Plugin. If our WooCommerce integration does not find an active copy of WooCommerce, it will show an error message.
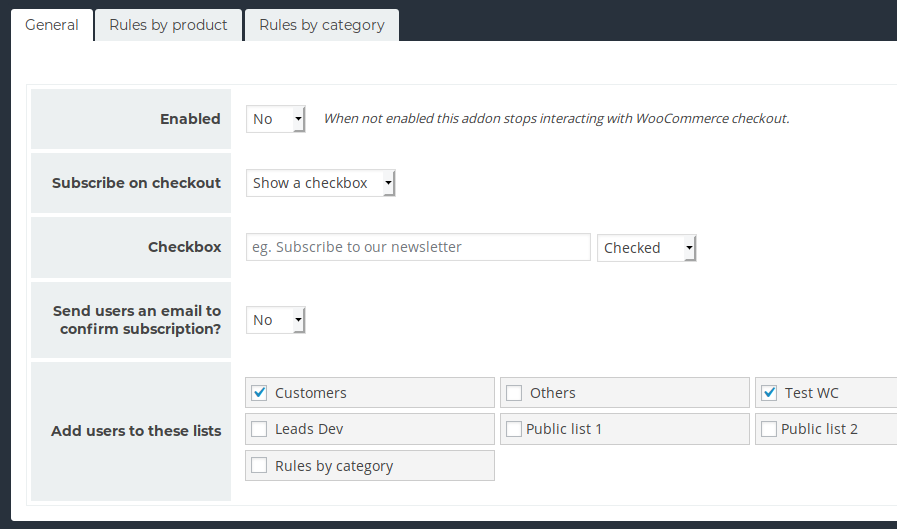
The extension panel is very simple. There are three main options:
- Global enable/disable button
- Whether to enable or disable the subscribe radio button and which text should be shown next to it
- Whether or not to send the subscribers a confirmation emailChoosing a default list for new subscribers
Enable WooCommerce Extension
This option enables or disables the automatic subscription of every user that places an order through a WooCommerce powered checkout page.
Show a confirmation button and text
With this option, users will be asked to confirm whether they accept or not to subscribe to your newsletter. You can also specify a custom message to be shown next to the button, e.g. to comply with specific privacy laws or to simply warn customers. Please note: if this option remains unselected, all customers will automatically be subscribed.
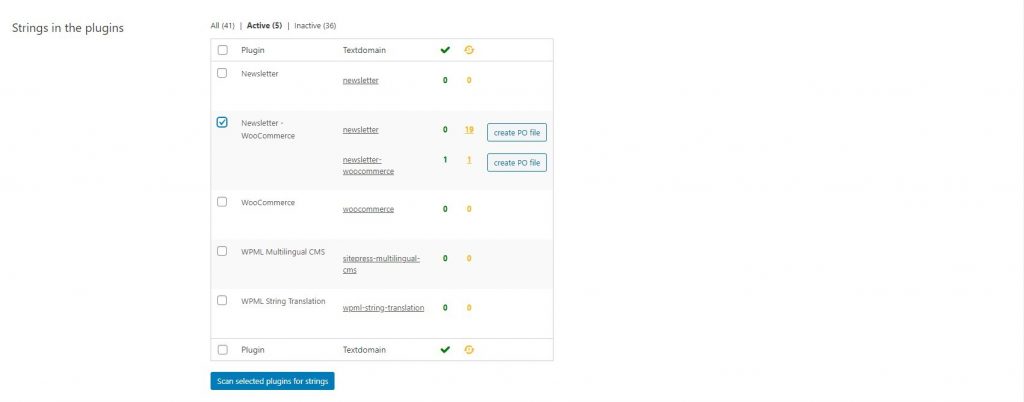
If you use a multilanguage plugin, you can translate that label with that plugin features. For example WPML Strings, Loco Translate, or Polylang.
Note: if you specify a custom label it will be used for each language: leave the field empty and see the guides below to translate with your preferred multilanguage plugin.
WPML
To translate with WPML, install their WPML Strings plugin. Then on WPML “Theme and Plugins localization”, force the scan of our plugin “Woocommerce – Newsletter”.
When the scan is completed, move to the WPML “String Translation” and filter by domain “newsletter-woocommerce”: you’ll find all translatable texts.
Loco Translate
On Loco Translate menu, select “Plugins” and identify the plugin “Newsletter – Woocommerce”. Click in it and then select “New language”. You should choose as location of the translation file “other” and possibly the “language/plugins/…”. Do not select to store the file on “plugins/newsletter-woocommerce/…” otherwise you’ll miss it on the next update!
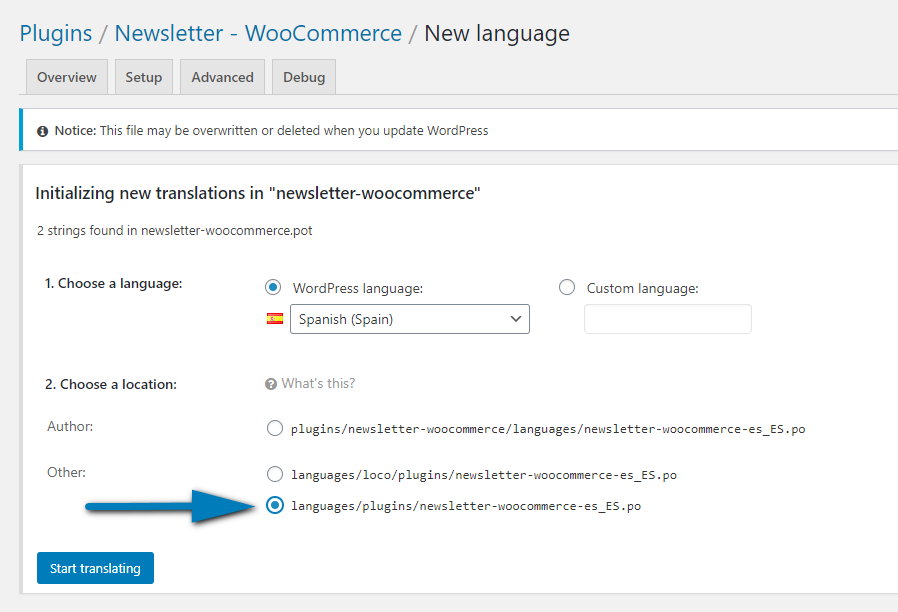
Ask users to confirm their subscription
If this option is left unselected, all subscribers will be flagged as confirmed and they will start to receive newsletters. If “yes” is selected, subscribers will be flagged as “non-confirmed” and an opt-in email will be sent out. Opt-in email can be easily customized following this guide.
Assigning new subscribers to an existing list
Users can easily select a default existing list (or more than one) to where the news subscribers will be registered to. Read more about lists here.
Importing customers as subscribers
From the import panel, all old orders can be processed and all customers (being them guest customers or not) imported as subscribers. Some options can be set to configure the import process.
Subscriber status. The subscriber status can be set to “confirmed” or “not confirmed” for all imported subscribers. If a subscriber is created as new, the status is just assigned as configured, if the subscriber already exists, the status does not change if not explicitly set with the option “override status for existing subscribers”. If the import mode is set to “skip” the existing subscribers status is not changed.
You can import customers as “not confirmed” subscribers if you want to send them a request to confirm their subscription.
Lists. You can set which lists should be assigned to imported subscribers. For existing subscribers, the “import mode” controls if the subscriber should be updated (adding the selected lists to its profile) or if it should be skipped. If a subscriber is in a list not selected in the import configuration, it is kept on that list. You cannot set a list to be “reset” for imported subscribers.
When the import does not complete
If the import does not complete ’cause the server resource limits are reached, the import process stores the last order processed and you can run the import again from that point. A warning is shown on top of the import panel if there is a not completed import process that needs to be ran again.
Customer segmentation
As customers buy products from your Woocommerce shop you can define rules to add them to specific Newsletter lists. This is sometimes called profiling or segmentation.
The extension lets to configure 20 per product rules and 20 per category rules. Product rules match single products while category rules match all products on configured categories. When an order is received (it’s not required for it to be completed), the extension examines the items and compares them against the defined rules.
Each rule is associated with a Newsletter list and when it matches the subscriber (identified by the customer email) is added to that list.
Rules are applied to your subscribers, they do not subscribe to your customers which are not already on the Newsletter contact list. If you want to import your customers as subscribers, install the free WP User Integration extension and run the import process. Then you can remove that extension (but be sure to offer the subscription option to your new customers configuring correctly the WooCommerce Extension).
Massively run a rule
Rules can be applied to all orders already in your system to segment even the old subscribers. That process can take some time to complete.
Usage example
Once you start to segment the subscriber by their ordered items you can send newsletters to strictly in target subscribers, reducing the number of cancellations, spam problems and raising the open and click rates.
If you use Automated, you can benefit from its ability to generate newsletters and send them to specific lists. You’re setting up a simple but effective marketing automation system.
For example, suppose to sell sport and outdoor products. And suppose to post in your blog, regularly, news about outdoor trends, tricks, product reviews, or location reviews. The first step you should set up a public list named “outdoor news”. Then configure an automated newsletter to be sent to that list getting content from the outdoor categories of your blog.
The last step, subscribe each customer who buys an outdoor product to that list, setting up a rule in the WooCommerce extension.
That’s all, you now have a fine-tuned newsletter which keeps informed only your customer interested on outdoor topics.
Creating a “Sales” Newsletter
Regular newsletters
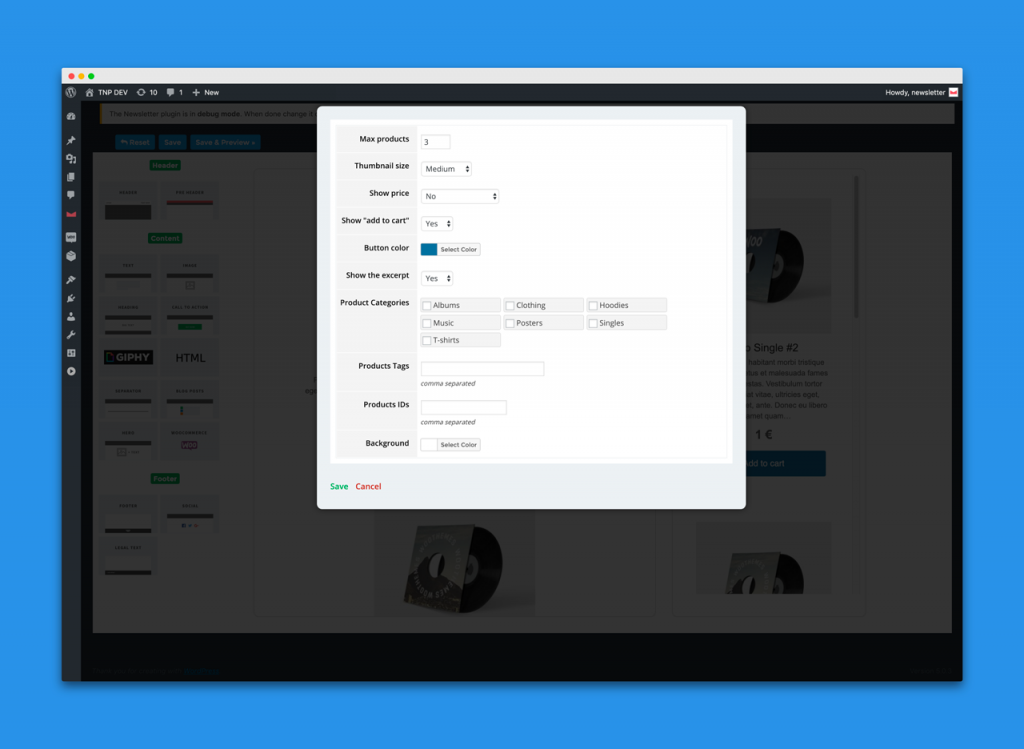
When composing a regular newsletter with our visual drag and drop composer you can find a new specialized block to insert product from your catalog. The block can be configured to extract products from categories, tags, single product IDs and choose the layout, and so on.
More blocks can be added to extract products from different categories and/or compose a newsletter with different layouts.
Automated newsletters
The WooCommerce add-on contains a theme for the Automated addon made to create an automatic newsletter with your latest products. You will find many layout and product selection options. It’s perfect to generate without any effort an automated email for your customer with the latest products added to your catalog.
Referrers
Users who subscribe from the checkout page will appear in the “Subscribers > Statistics > Referrers” panel in Newsletter as “WooCommerce checkout”.

